In this blog post, I want to show you how I deal with advanced text fields that are similar. What do I mean by that?
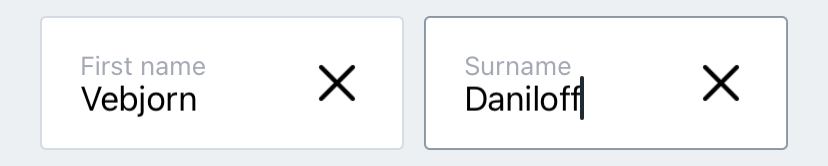
Let’s say your client wanted you to make text fields for various inputs in an authentication flow – A text field for the name input, the date input, the password input, etc. What is usually the case is that these text fields will now follow similar rules for their layout: backgroundColor, font, borderColor, etc. Like in the example below.
Also! I’m referring to all these components as a “text field”, but they are either a UIStackView or UIView that acts as a container for the UITextField. They may also hold other components like a UIButton for clearing, maybe one of them has another UIView for the backgroundColor and so on - You get the idea, it would be hard to create an advanced text field with only the UITextField class itself.
Okay, so how do I deal with this problem? I would say that there are three approaches in my mind that you can take: one bad, one that is kind of bad and one that is great.
1.1 Subclassing
The first and the worst (sick rhymes) approach would be to focus on subclassing. What do I mean by that?
Let’s say you created a text field for the email input.
1
2
3
4
5
6
classEmailTextField:UIView{// this would be the setup code; layout, constraints etc.funcsetup(){}// a specific method related to this classfuncdoSomEmailMethod(){}}
Now we can create a text field that represents a password input with the same layout by subclassing, but it also needs independent methods, and since it is a PasswordTextField it doesn’t need the doSomEmailMethod. To cancel the doSomEmailMethod we just override it.
Why is this bad? The problem now is that every change in the EmailTextField will affect the PasswordTextField. This approach also gets incrementally worse. Why? What if we created a text field for the name input (NameTextField) and used the PasswordTextField as the superclass? Now the NameTextField is affected by the changes in PasswordTextField which is affected by the changes in the EmailTextField. This leads to no clear separation and is considered bad practice.
1.2 Write them from scratch
If you wrote all the classes from scratch you will achieve clear separation between them, and they will not depend on each other. So why is this bad? The reason is that we now have a lot of unnecessary code duplication. We know that all of these classes have similar setup, so there must be a better way.
1.3 Use custom configuration for each text field
This is the best approach. We can pass a configuration that can dynamically configure the text fields individually when we create an instance of them, but they will still use the same class. I use this in the Messenger clone application, and it’s common in production code.
2 SwiftUI preview
It would seem foolish in this case to build the project in the simulator for each little change that we would make in our class, so let’s configure the SwiftUI preview to work with our UIKit code.
Since we want to view multiple instances of the same text field, a preview for a UIViewController that displays all our text fields would improve our workflow.
importSwiftUI// 1) Extend the functionality of viewcontrollers so that they can be used in a SwiftUI PreviewextensionUIViewController{// 2) We create a struct that conforms to UIViewControllerRepresentable.// Why? with this protocol our struct can act as a SwiftUI view wrapper for viewController.// Which means that we can pass in a viewController to this struct and it will wrap it into a SwiftUI viewprivatestructPreview:UIViewControllerRepresentable{letviewController:UIViewControllerfuncmakeUIViewController(context:Context)->UIViewController{returnviewController}funcupdateUIViewController(_uiViewController:UIViewController,context:Context){}}// this method now expects a SwiftUI viewfuncshowPreview()->someView{Preview(viewController:self)}}
finalclassCustomTextField:UIView{// MARK: - Components// we may refer to this class, outside of the CustomTextField classlazyvartextField:UITextField={lettextField=UITextField(frame:.zero)textField.textColor=.labeltextField.translatesAutoresizingMaskIntoConstraints=falsereturntextField}()privatelazyvartextFieldBackgroundView:UIView={letview=UIView(frame:.zero)view.backgroundColor=.black.withAlphaComponent(0.125)view.layer.cornerRadius=10view.layer.masksToBounds=trueview.translatesAutoresizingMaskIntoConstraints=falsereturnview}()// MARK: - LifeCycleoverrideinit(frame:CGRect=.zero){super.init(frame:frame)setup()}requiredinit?(coder:NSCoder){fatalError("init(coder:) has not been implemented")}// MARK: - setupprivatefuncsetup(){addSubview(textFieldBackgroundView)textFieldBackgroundView.addSubview(textField)// use the intrinsic height of the UITextField to configure top and bottom for the text fieldBackgroundViewtextFieldBackgroundView.leftAnchor.constraint(equalTo:leftAnchor).isActive=truetextFieldBackgroundView.rightAnchor.constraint(equalTo:rightAnchor).isActive=truetextFieldBackgroundView.topAnchor.constraint(equalTo:textField.topAnchor,constant:-9).isActive=truetextFieldBackgroundView.bottomAnchor.constraint(equalTo:textField.bottomAnchor,constant:9).isActive=truetextField.leftAnchor.constraint(equalTo:textFieldBackgroundView.leftAnchor,constant:6).isActive=truetextField.rightAnchor.constraint(equalTo:textFieldBackgroundView.rightAnchor,constant:-6).isActive=truetranslatesAutoresizingMaskIntoConstraints=falseheightAnchor.constraint(equalTo:textFieldBackgroundView.heightAnchor).isActive=true}}
If your run the code, you realize that all our instances of CustomTextField produce the same text field.
So how can we make our instances dynamic? One option is to create variables that resembles the properties of our text field:
1
2
3
4
5
6
7
8
9
10
11
12
13
14
15
16
17
lazyvartextField:UITextField={lettextField=UITextField(frame:.zero)textField.textColor=.labeltextField.isSecureTextEntry=isSecure// heretextField.placeholder=placeholder// and heretextField.translatesAutoresizingMaskIntoConstraints=falsereturntextField}()varisSecure:Boolvarplaceholder:Stringinit(isSecure:Bool,placeholder:String){self.isSecure=isSecureself.placeholder=placeholdersuper.init(frame:.zero)}
This seems like a good solution, but as our text field grows in complexity we end up with to many variables – and we also don’t have an approach for handling individual methods. In other words, we need a light object with all our properties, but the logic of our properties/methods should be determined by some input case. Whether you realize it or not, we just described a struct that is configured by the input of an enum.
3.1 Creating the custom configuration
We create the enum that we pass to our object:
1
2
3
4
5
6
7
8
9
10
11
12
extensionCustomTextField{enumTypes:String{casenamecaseemailcasepassword// just to simplify the placeholderfuncdefaultPlaceholder()->String{return"Enter your \(self.rawValue)..."}}}
extensionCustomTextField{structViewModel{vartype:Typesvarplaceholder:String?init(type:Types,placeholder:String?=nil){self.type=type// custom placeholder or "" placeholder sticks, but no value return our default implementation// ternary operator, basically an if else statement in one lineself.placeholder=placeholder==nil?type.defaultPlaceholder():placeholder}varisSecure:Bool{type==.password?true:false}varkeyboardType:UIKeyboardType?{switchtype{case.name,.password:return.defaultcase.email:return.emailAddress}}varautoCap:UITextAutocapitalizationType{type==.name?.words:.none}}}
Now this is logical, scalable and you’ll find this approach in production code .
Let’s implement this in our text field.
 1
 2
 3
 4
 5
 6
 7
 8
 9
10
11
12
13
14
15
16
17
18
19
privatevarviewModel:ViewModelinit(viewModel:ViewModel){self.viewModel=viewModelsuper.init(frame:.zero)setup()}requiredinit?(coder:NSCoder){fatalError("init(coder:) has not been implemented")}privatefuncsetup(){textField.isSecureTextEntry=viewModel.isSecuretextField.placeholder=viewModel.placeholdertextField.keyboardType=viewModel.keyboardTypetextField.autocapitalizationType=viewModel.autoCap// ...}
Nice! Now we have three different text fields instances, but they are created from the same class. Now you might ask: “But, what about states? How can I show a border if one of the text fields is active?”. If you think about it states are a list of possibilities, just like an enum.
Okay so where do we set the focusState? The state has to be set when the editing of the text field did begin (textFieldDidBeginEditing), and it has to be disabled when editing has ended (textFieldDidEndEditing). These two methods are owned by the UITextField, but they can be used by any class of our choice. To tell the UITextField that our CustomTextField can use these methods, we have to assign our CustomTextField as the UITextField’s delegate.
1
textField.delegate=self// self is CustomTextField
Now XCode will yell at you because our CustomTextField isn’t capable of handling the delegate methods of a UITextField. So we need it to conform to the UITextFieldDelegate.
1
2
3
extensionCustomTextField:UITextFieldDelegate{}
Now handle the focus with the two methods mentioned.
Nice. Now the UITextField will notify our CustomTextField class every time the text field is in focus and when editing stopped.
3.3 Handling state
However, nothing happens when the state changes. We need some method that can respond in relation to changes in the focusState. So how can we do that?. If we attach a didSet property observer to the focusState it will run code whenever the property has changed, which is exactly what we want – because we want to trigger a method for handling new changes when our state has just been set.
 1
 2
 3
 4
 5
 6
 7
 8
 9
10
11
12
13
14
privatevarfocusState:FocusState=.inActive{// The didSet will execute code when a property has just been set.didSet{focusStateChanged()}}// ...// MARK: - Private MethodsprivatefuncfocusStateChanged(){textFieldBackgroundView.layer.borderColor=focusState.borderColortextFieldBackgroundView.layer.borderWidth=focusState.borderWidth}
Now run the code and see our text fields responding to their focusState.
4 Conclusion
I hope you found this article useful for creating a more advanced text field. In the next article we are going to further improve our CustomTextField by developing a validation behavior with Combine.